How TorchX Sends Emails
Email Forwarding
Emails Sent by TorchX
Recording Emails/Round Trip Routing
Email Tool
Text and Mass Text
Your Email Signature
Handling Replies
How TorchX Sends Emails
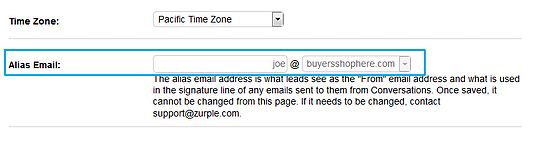
All emails that are sent from the TorchX system on your behalf are sent from your alias email.
The alias email is a forwarding email created by TorchX and allows TorchX to deliver emails on your behalf, forward emails to you, and track and display replies and conversation threads in your back office.
You can find your alias email in your back office under My Profile.
Email Forwarding
TorchX forwards messages sent through your alias email (i.e. notifications and lead replies) to your login email.
You can set up your alias to forward to up to 5 email addresses.
Currently any changes to your email forwarding can be handled by TorchX’s Support Team.
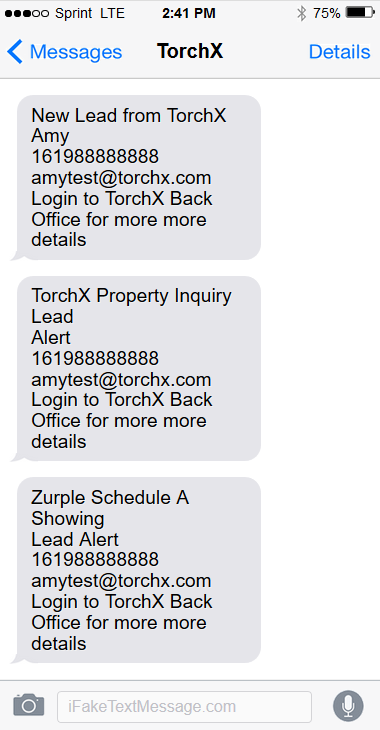
Text alerts will also be sent to your primary phone number listed in your Profile . You will receive text alerts only for the notifications below:
- New Lead Alerts
- Property Inquiries
- Agent Inquiries
- Schedule a Showing Alerts
These text alerts will allow you to be more quickly alerted on the notifications that will require your expertise, experience and engagement to manage, particularly 2-4 mentioned above.
Emails Sent by TorchX
There are 3 types of emails that are automated by TorchX to both you and your leads:
- Notifications/Lead Alerts – Sent to you
TorchX emails you to notify you of new leads, lead behaviors and property insights. The notification reasons are listed in the “Alerts” tab in any lead detail page.These emails will include details about the lead and suggested actions you may take in lieu of TorchX sending an email. - Market Snapshot Emails – Sent to your leads
Market Snapshot Emails are emails sent to your leads that contain market data associated based on their activity on your search sites or properties they are searching. You can view these emails under “TorchX Messages” in any lead detail page. - Sold Home Notifications – Sent to your leads
These are emails sent to leads which contain information on properties that have recently sold in their area. You can see the open rate and which listings your lead clicked on under the “Properties” tab in the lead detail page.
Recording Emails/Round Trip Routing
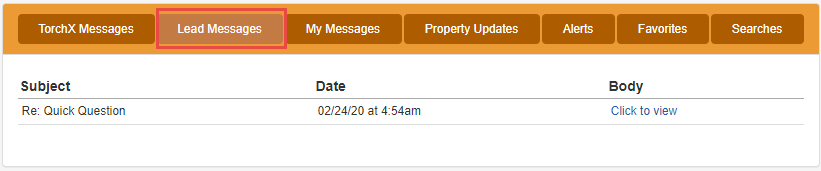
All messages from your leads that are sent to your alias email are stored under Lead Messages in the lead detail page:
With our Round-Trip Routing feature, we also display your entire email thread. Whether you:
- respond to a lead,
- send a once-off message using the “Send Email” feature in the lead detail page, or
- include the lead in a mass email,
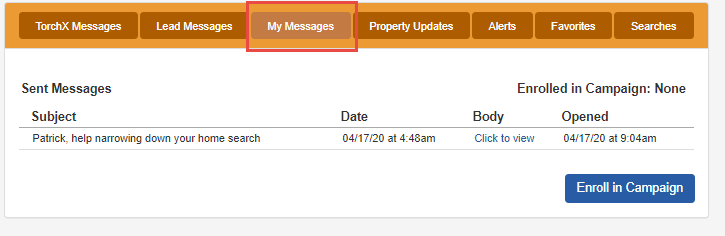
Your message is stored in the My Messages tab:
When you reply to a lead, you may notice an alias email for your lead in the “to” field. Your lead will never see this alias email address in their email but it’s important because this is what allows TorchX to record your email thread.

Email Tool
You can send an email to a lead from the back office by selecting “Send Email” on the lead detail page.
You can also use this tool to send emails to groups of your leads.
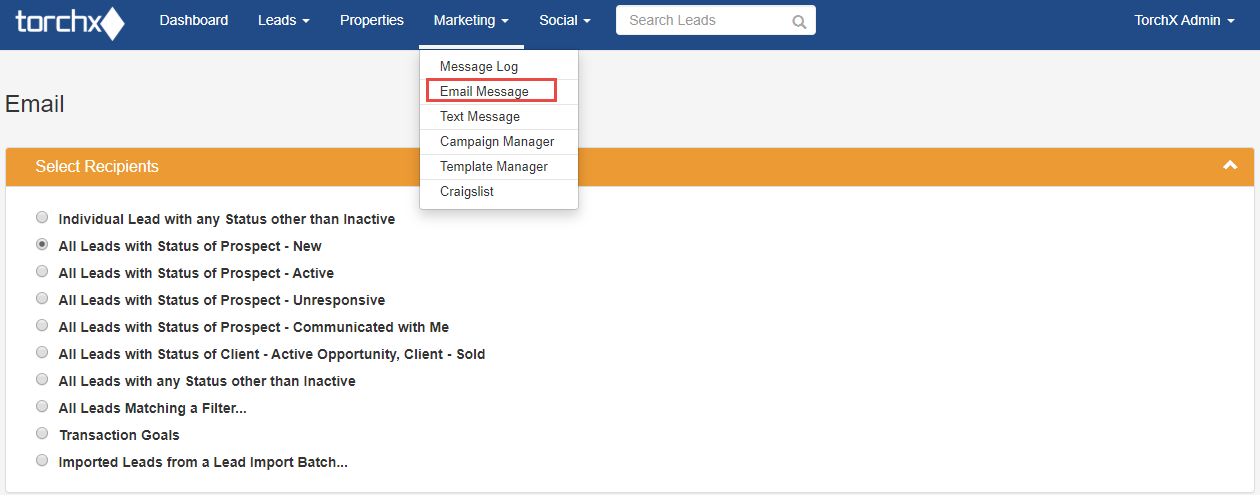
If you select “All Leads Matching a Filter”, you will have an option to create a filter based on the city saved in their email preferences or their saved price range.
In the body of the message you can use the Special Parameters feature to help personalize your emails.
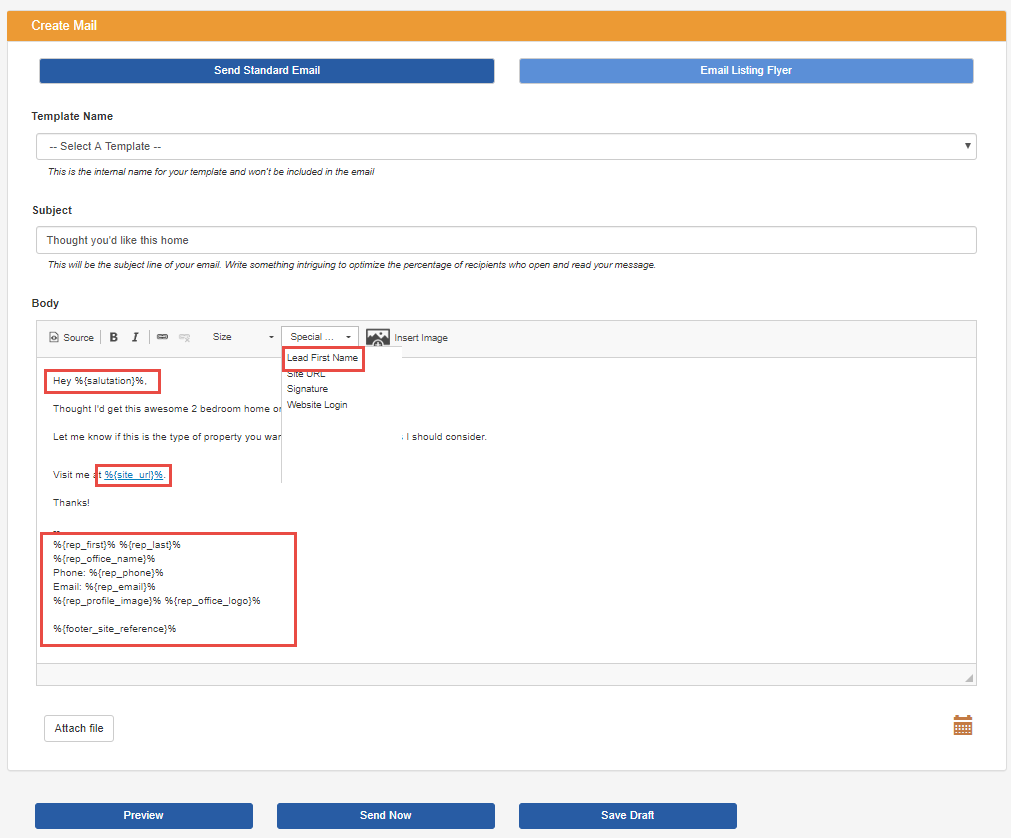
- Salutation will populate the first name of each individual.
- Site URL will populate the domain of your site.
- Signature will populate your contact information as it exists in your profile including your photo and logo.
At the bottom of the Email page there are buttons to Preview, Send, or Save Draft. When you select Save Draft, you can exit or log out and whatever you typed will still be there when you come back.
You may only save one draft at a time. After saving a draft once, it will stay there until you save a new draft. If you’d like to remove the draft, just delete the email content and click “Save Draft”.
If you want to send an HTML email, select the Source option first and then paste the code/text. Click Source again to view the image.
The email tool does not support attachments. Alternatives to this include using the Source option above, sending links or using file sharing software such as Google Drive or Drop Box.
The mass email feature is a great way to to invite your leads to your open houses and announce your new listings or pocket listings. It can also be a great tool to engage unresponsive leads when used correctly. Click here for a Mass Email for Conversations printable tutorial.
Text and Mass Text

If your lead has a phone number, you can send an individual text through the lead detail page or include that lead in a mass text. The text is sent as an SMS from an alias phone number so that the message and reply is captured on the lead detail page. Replies to texts sent through the back office will forward to the agent’s phone.
SMS messages sent through TorchX are stored under My Messages. If the lead has a phone and a cell number, TorchX will send the message to the cell number.
Your Email Signature
TorchX controls the email signature in the automated agent emails. The signature is created by pulling your name, phone number, alias email and brokerage from your profile. The signature will also pull in the DRE/BRE number from the profile to meet compliance standards.
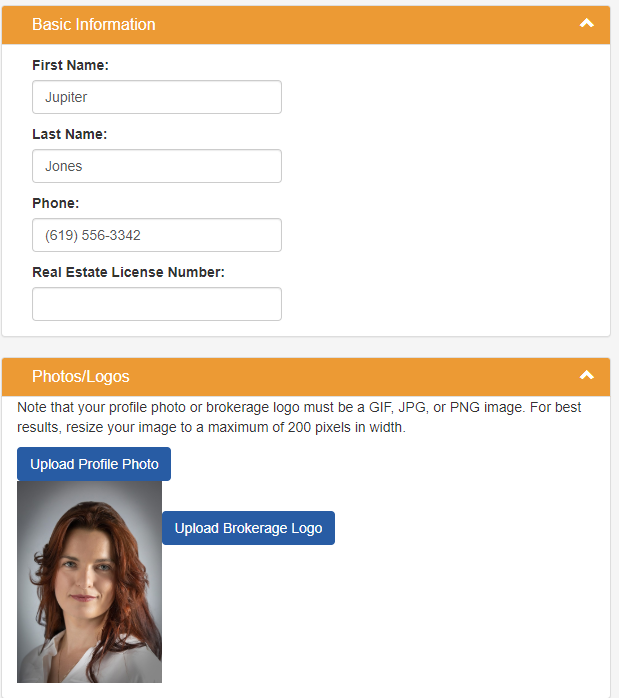

In order to optimize the automated agent emails for replies, TorchX must ensure consistency with each message. Every additional item added to the email and the email signature (i.e. photo, tagline) can dilute the message and draw people away from the call to action, which is to encourage leads to click on the site link so they can continue to engage with properties.
Along this line, the first email message sent to new leads will contain your agent image and brokerage logo, but each Automated Email thereafter will only contain your text signature. You are able, however, to add the pictures to your signature when sending out your own emails via the back office.
Handling Replies
When a lead replies to an automated agent email, respond immediately!
TorchX doesn’t replace you in the process; it provides more opportunities for you to develop relationships with your buyers. When a lead responds to one of the automated agent emails, it is your responsibility to reply and continue to cultivate the relationship.
Follow up by email and phone (if you have a number) when your lead:
- Responds to an email
- Submits a “Property” or “Agent” Inquiry
- Schedules a showing
Since email threads are recorded on the Lead Detail page (in the My Emails tab), you can review any previous emails you received from your leads and check the properties they viewed prior to responding.
While some lead replies may have be more straightforward (i.e.“What are the HOAs here?”). Others may be more open-ended (i.e. “Thanks, I’m just browsing.”).
Regardless of the reply, here is a simple Easy A formula for engagement success:
- Address the lead’s request/reply.
- Add value by providing helpful, relevant info.
- Ask questions.
- Advance the relationship.
Also remember that regardless of the reply, you do not have to deviate from your normal business practices. If you prefer to meet a new lead at your office before taking them to view properties or if you like for your leads to get prequalified, include that in your response.
For example, if your lead replies:
Thanks. I would love to see the property this weekend. How is Saturday at 2pm?
But you prefer to meet at your office first, you can respond:
Perfect. I have a few questions for your first. Can we meet at my office at 1:45pm? Here is the address…
Or if you prefer to move the prequalification process forward before agreeing to show property, you can respond:
Perfect. Let me confirm that the property is on lockbox or can be shown Saturday at 2pm. I will get back to you shortly.
One critical step that we should begin (if you have not already,) is getting pre-qualified for a loan. It can be incredibly disheartening to miss an opportunity because of a pre-qualification delay.
Have you started that process?
Campaign Manager
To edit your Campaigns Templates:
- Login into your back office
- From the top menu hover over Marketing
- Select Campaign Manager
Campaigns are a series of messages sent to leads to nurture and build a relationship. In the Campaign Manager’ you can view, enroll, view leads, and see campaign details. If you click on any of these campaigns, you can see the number of currently enrolled leads in the campaign, the total number of currently enrolled leads in the campaign, and the duration of total number of days the campaign will last from enrollment to the final email being sent.
When you click on Template Manager you can view all accessible templates. Pre-installed templates are called ‘Global Templates’ and cannot be edited.
You can also create custom email templates to use in campaigns and mass emails. To do so, under ‘Campaign Manager’, please click on the blue button on the top right corner called ‘create new template’.
To create and edit your own template please select New Template. From here create your subject line and select your placeholders. Placeholders are a list of variables associated to the lead or agent. The system will automatically insert individuals’ names. Each template allows you to attach a single file. Click Preview to view the structure of your template before clicking save.
The Campaign details page allows agents to create and edit their own templates, as well as see the details of a TorchX pre-installed campaign. To add an additional email to a campaign, click Add Template and select which template you would like to add to the campaign. You can rearrange templates, edit, and select days to decide when emails will send out. Agents should note leads will automatically unenroll from a campaign if they no longer meet the enrollment criteria. Leads can be enrolled in one campaign at a time.