Site Domain
Site Features
Displaying Agents
Showcase Your Listings
Custom Pages
Top 5 Cities Home Page & Template
Form Qualifiers
Site Domain
During the GoLive process, the domain is chosen according to a predetermined naming formula and hierarchy. The domain will contain the main city we are targeting for traffic and terms related to real estate, homes, searching, etc.
The goal of the domain is to match the intent of the leads we are targeting online, and cannot be changed once the GoLive team has purchased it for you and your account is live.
The domain name relates directly to the search site and the leads that register off of that site, so any changes to the domain name will affect the your Alias Email address and confuse leads/disrupt conversation with them.
TorchX purchases and maintains ownership of the domain(s) purchased for your account. If you wish to utilize a domain that you already own, it is recommended that you use it as a forwarding domain to your personal marketing link. This way you can track your personal marketing efforts more effectively. See Personal Marketing for more information.
Site Features
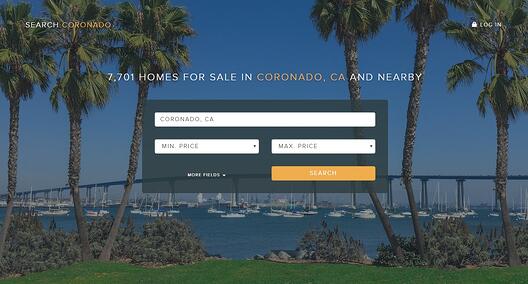
Site Background Image
Changes to your site background image must be done through the Support Team. The image must be at least 1200×800 pixels.
To request to update your site background image, attach your PNG or JPEG image file to an email and send it to support@torchx.com.
Site Tabs
Changes or additions to your TorchX site tabs must be done through Support. A TorchX site can display 2 custom tabs in addition to your ‘About’ or ‘Agents’ tab.
To request to add, remove, or change a tab, email the Support team at support@torchx.com with the exact text to display and the hyperlink you would like it to direct to.

Displaying Agents
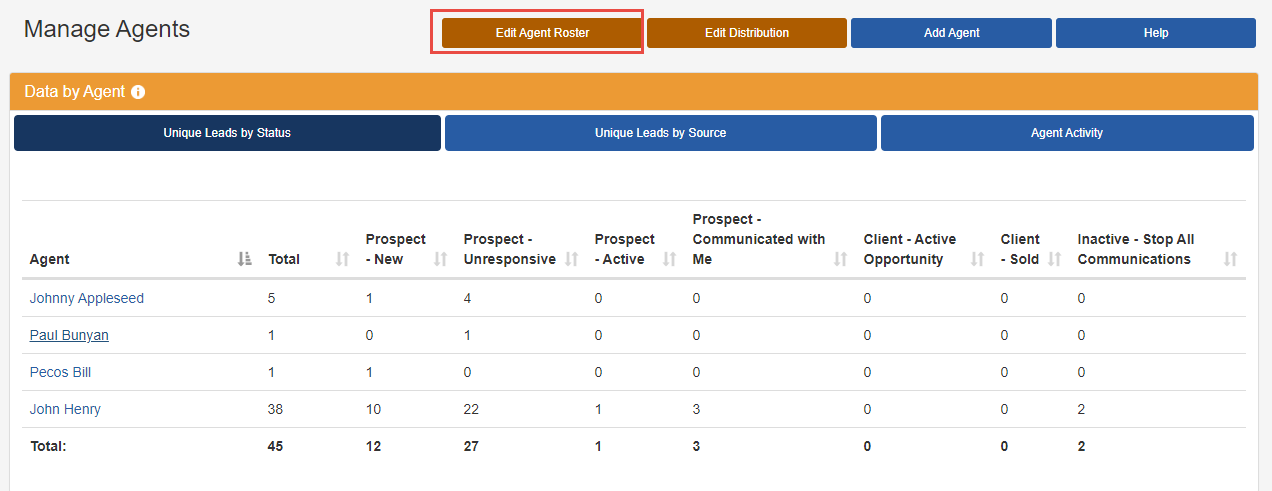
If you have a team of agents, you can control how they are displayed on the Agents page (see image above).
The ability to control this display is in the Site Owner’s back office. Visit the Manage Agents tab and select “Edit Agent Roster” to adjust the display. You must save the display for each search site.
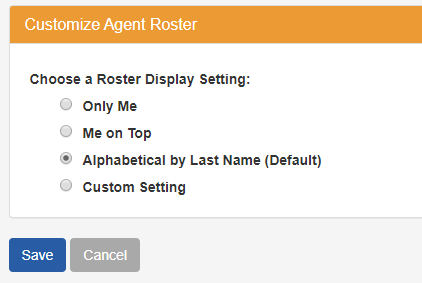
The default setting will be to display your agents alphabetically but you also have the option to select:
- Only Me: Only display the site owner
- Me on Top: Site owner display on top
- Custom Setting: Select which agents to display or not display
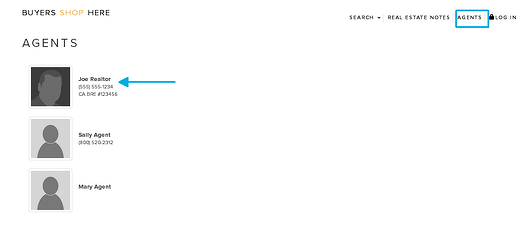
The roster on the search site will display whatever image the agent has uploaded into his/her profile photo. If no photo exists, a default photo will appear. The agent page will also link to the agent bio page. Encourage your agents to complete their profiles.
In this screenshot below, the Site Owner selected “Me on Top” for the Roster Display. For more about team features, see Managing a Team.
Showcase Your Listings
While your traffic and leads are not directed to the homepage, you can showcase your listings in place of the default listings.
There are 8 featured properties on your search site and however many personal listings you have will determine how many of those eight are replaced. If you have three personal listings, they will show alongside five other high-end properties.
Contact the Support Team to make your request. You cannot specify the order of listings or which listings appear.
Another way to showcase your listings is by adding Property Notes. See Additional Features for more information.
Custom Pages
Account owners now can add custom pages to their website!
From the left pane, navigate to settings and ‘Manage Site’.
- Users can add up to 3 new pages including whatever content they desire and a customized headline.
- You can also select what pages will show up as links in the top menu bar on your site.
- Users can select the ‘Preview’ button to review the page before it gets published.
When you have the everything setup for your Custom Page
- ‘Unpublished’ will keep the custom page hidden, with no way to view the page on your site.
- ‘Published’ will activate the custom page to be viewed by anyone!
Top 5 Cities Home Page & Template
Top 5 Cities
The site will display one (1) main market city and four (4) additional cities. Each city has a default image, specific to that city. The default image is taken from the highest priced listing in that specific city. However, you can also set a custom image for each of your Top Five (5) Cities!
To add custom images, you will start at your TorchX dashboard.
On the left pane, select Settings and Manage Site.
The Homepage Settings section is where you can make changes to images associated with your Top Five (5) Cities.
This section has two main functions; the ability to customize images to each of your specific cities + change your preferred cities.
Home Page Images
The ‘Main Banner Image’ will change the image that is associated with your background photo of the website. This is defaulted for you at the start of your account but can be changed here at any time.
The next five (5) cities all operate the same. You can select the city drop-down menu to change your market city in the designated position. You can also set the default image for each of your cities. Select the ‘Upload City _ Image’ to update the default image that is displayed on your site.
Welcome Blurb
You have the option of adding a ‘Welcome Blurb’ to set a personal message for all your potential clients to see!
The ‘Welcome Blurb Title’ will be displayed above the content box. The ‘Welcome Blurb’ will be displayed as the welcome message on the site. The ‘Featured Image Button’ will add further personalization by adding a custom image with your custom message.
Important: To apply any changes that you made above; you must select ‘Save’ at the bottom of the page.
Form Qualifiers
To ask additional questions of your leads, you can enable Form Qualifiers in the Manage Sites section of your back office. Scroll to the bottom and you can add 3 optional questions to ask your lead after they sign up on your website. Choose from the included questions or write your own.
The questions will not deter visitors from signing up as leads, because they will appear after they provide their contact information.