Managing a Team
Adding Agents
Distributing Leads
Overrides to the Distribution Settings
Price Override
Verifying Lead Distribution
Delete an Agent
Reassigning Leads
Statistics
Managing a Team
You must be the designated Site Owner in order to add additional agents.
As the Site Owner, you have the ability to add and remove agents within your back office, set lead distribution reassign leads, and monitor agent activity. You can also adjust how you display your agents on your search sites. Visit the Search Site page for more information on displaying your team members.
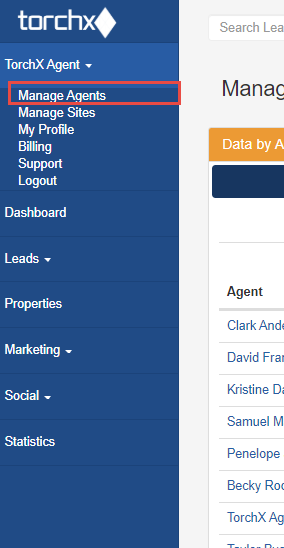
Most of the team features are available by clicking on the Manage Agents link on the top right corner of the back office.
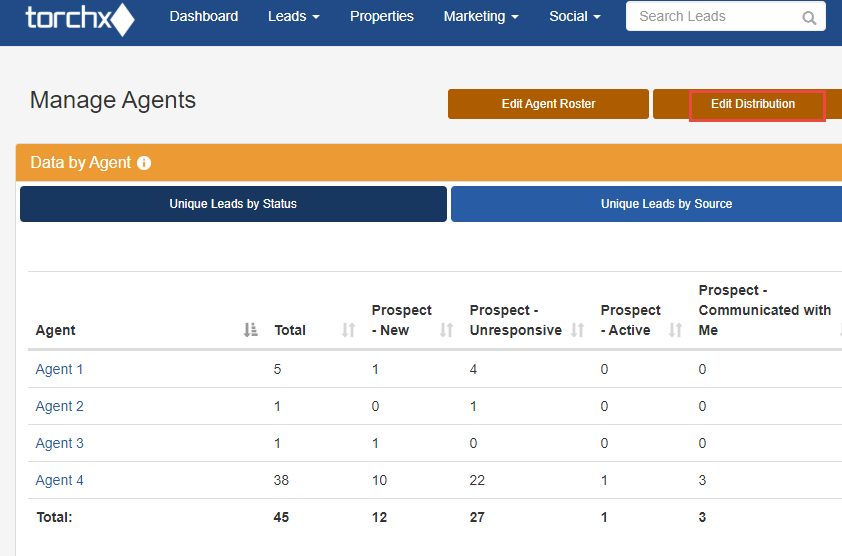
Here you can see your agents’ activity, the number of leads per agent and the source of their leads.
Adding Agents
To add a new agent:
-
- Click on “Manage Agents” in the top right corner
- Click on “Add Agent” under your name in the same area
- Complete “Basic Information” and “Brokerage Information”:
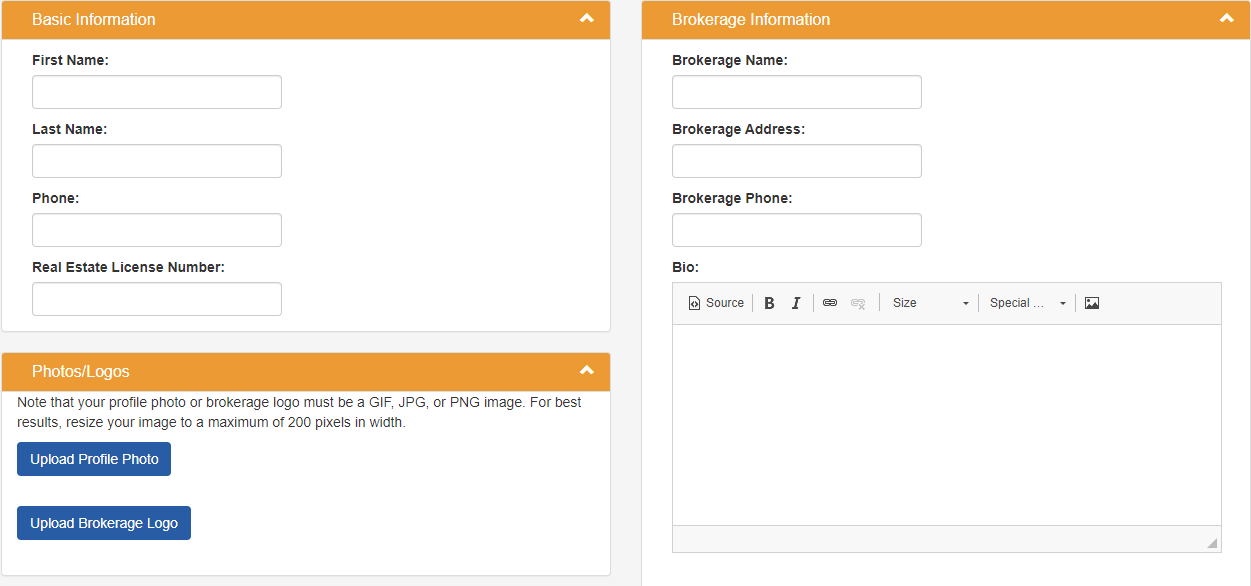
- Include: name, phone number, license#, brokerage name, address & phone.
- Complete “Login” section:
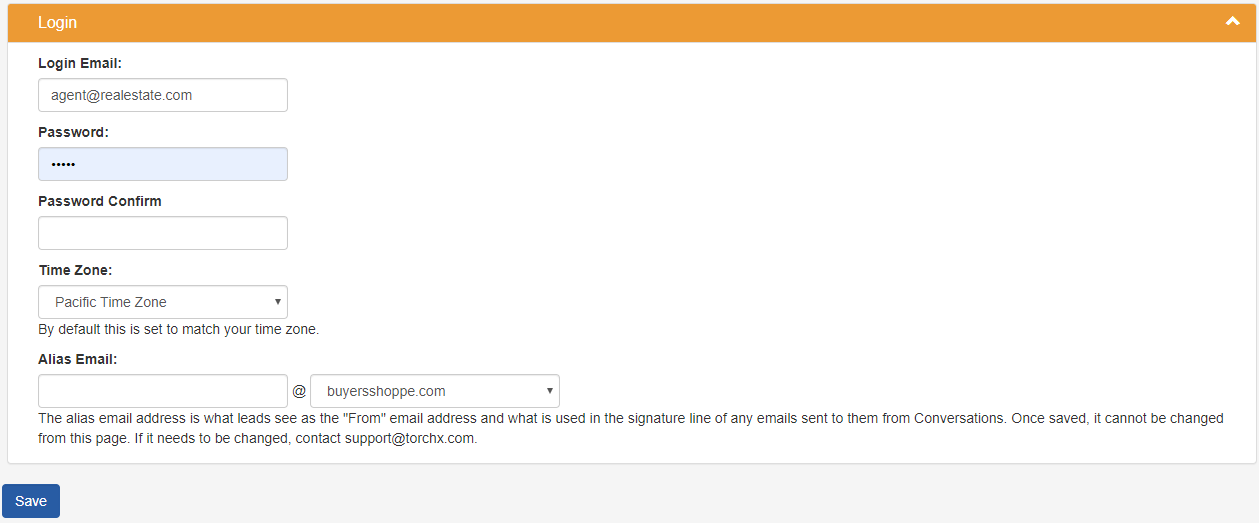
Login Email: use the email address that the agent wants to receive his/her lead notifications to.
Alias Email: automatically will be agent’s first name - Click “Save”
You do not need to upload profile photos, brokerage logos or bios if you do not have this information.
The agent can upload that information under “My Profile” under the back office once they are added.
Images need to be 200 pixels (width) max before being uploaded.
Distributing Leads
There are 4 options to editing your lead distribution. Please remember that the distributions must be set per site.
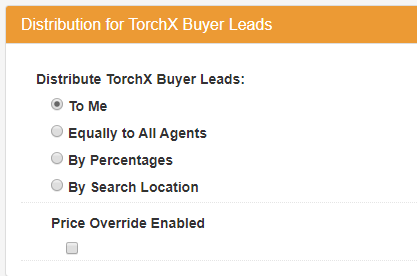
Distribute All TorchX Unique Leads:
- To Me
All the new, unique leads will route to you.
- Equally to All Agents
The new unique leads rotate evenly between all admins. - By Percentages
The new, unique leads rotate based on the percentages you have set. - By Search Location
The new, unique leads rotate based on the primary city, which is set based on the first search the lead completed. You can assign one or multiple cities to an agent and you can assign the same city to multiple agents.
Overrides to the Distribution Settings
Sometimes a lead may override the normal distribution. This may happen if:
- The lead is already owned by another agent on your account.
- Another agent used his/her personal marketing link to generate that lead.
- The lead was added manually in the back office or imported.
- A price override has been enabled.
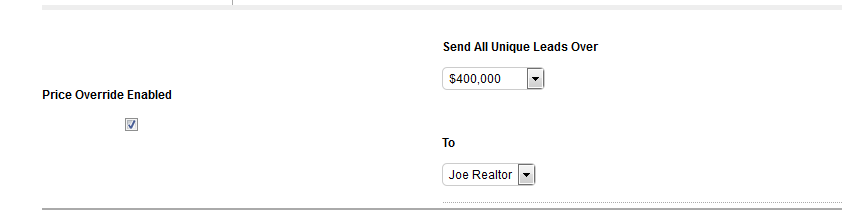
Price Override
The price override will allow you to override the current distribution settings based on a price MINIMUM. This minimum is based on the first search the buyer did while on your site.
Example
You select the price override enable option with a minimum price of $400,000. This means you will receive new, unique leads searching for homes over $400,000.
 Scenario 1: The buyer enters your site and searches for homes in all price ranges (i.e. selected No Minimum – No Maximum).
This buyer will go into normal rotation regardless of the homes selected after the search because the minimum is LOWER THAN $400,000.
Scenario 2: The buyer enters your site and searches for homes between a minimum of $200,000 and a max of $600,000.
This buyer will go into normal rotation because the minimum price is LOWER THAN $400,000.
Scenario 3: The buyer enters your site and searches for homes $400,000-$600,000.
This buyer will be directed to you and override the current rotation settings because his minimum price is EQUAL TO $400,000.
Scenario 4: The buyer enters your portal and searches for homes $1,000,000-No Maximum.
This buyer will be directed to you and override the current rotation settings because his minimum price is GREATER THAN $400,000.
Verifying Lead Distribution
On the Manage Agents page, you will see a button titled Unique Leads Since Last Modification. This will display how the leads have been distributed in general since the last change was made to the distribution settings.
If you wish to view the Lead Distribution settings on a per site basis, you will need to click the “Edit Distribution” button and then use the “Switch Site” drop-down list to see each site’s settings.
Note that this will reset each time you update the distribution settings.
Delete an Agent
You must reassign all the agent’s leads (prospect, client and inactive statuses) prior to deleting them.
Once all of the agent’s leads have been reassigned, go to Manage Agents, select the agent’s name and select Delete Agent.
Reassigning Leads
A lead will receive Automated Agent Emails, Mass Emails, and Property Updates from the agent who “owns” it. If you reassign leads, you will change who the lead receives emails from.
Some teams prefer to have one person cultivate the lead before assigning it to an agent and others just come across situations where they need to reassign a lead to a new agent (i.e. a team member leaves). Below are steps to reassign leads and our suggested method to communicate with contacts and agents when a reassignment takes place.
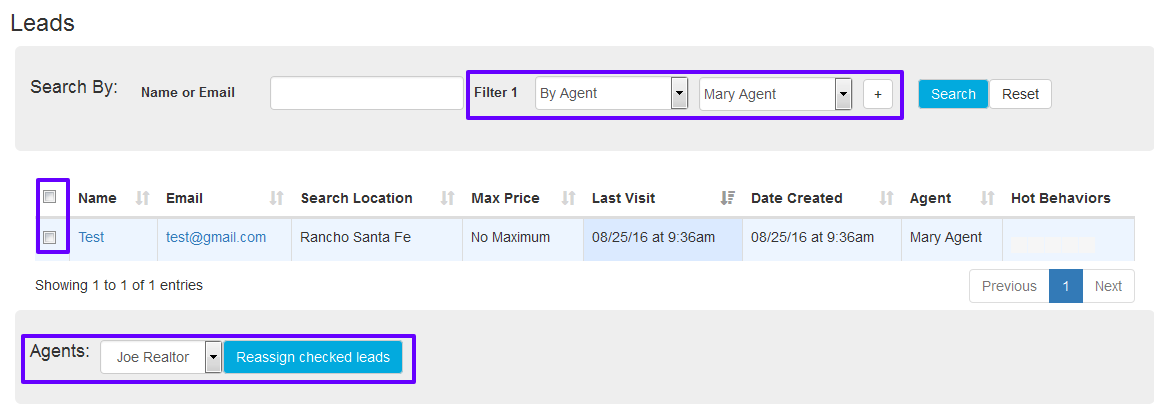
Steps to Reassign Leads
- Click on the “Leads” tab.
- Search for the lead by name or email address or filter leads “By Agent”.
- Check mark the box on the left of the lead name.
- Scroll to the bottom of the list and select the agent from the “agents” drop down menu, whom you wish to reassign the lead to.
- Click “Reassign Checked Leads”.
Statistics
On the Manage Agents screen and the Statistics tab you can see many of the statistics related to your lead distribution and agent activity. Remember to use the “Help” button for more definitions for the buttons on this screen.
Data by Agent
On the Manage Agents screen you can see Data by Agent including unique leads by status and by source. Agent Activity will show you who are writing property notes and how often your agents are logging in.
Data by Site
Lead distribution is set on a per site basis. Here you can see the unique leads by status and source and even see how leads have been distributed since you last updated the distribution.
Statistics
On the Statistics page, you can select an agent and a date range to see particular lead activity for this agent’s leads on your site. You can review the Lead Stats, Site Stats, Email Stats and Source Stats. Remember to click on the “Help” button on this screen for more definitions for information on this page.